


In reply to Post #23
I just bought some cheap weights eye bolt couple of washers the weight is spread and the pole aint never gonna move 1.25kg
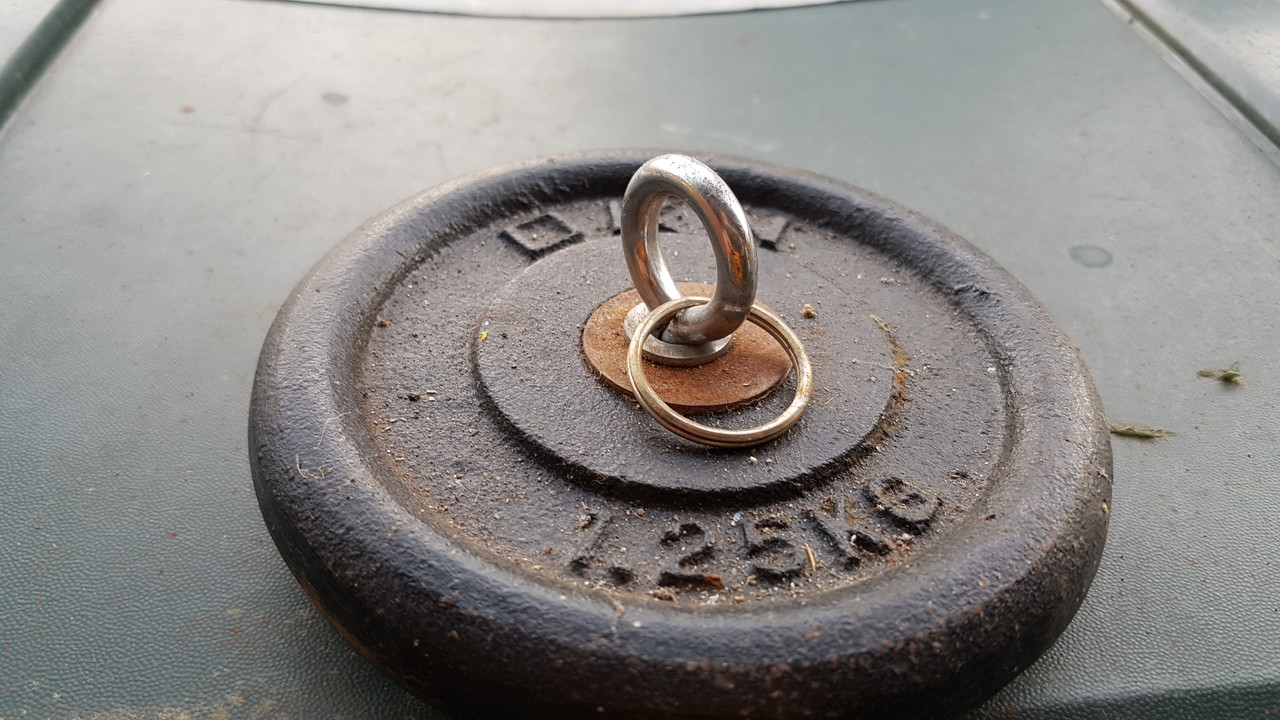
I just bought some cheap weights eye bolt couple of washers the weight is spread and the pole aint never gonna move 1.25kg

In reply to Post #25
Funnily enough, I was thinking about using weights but wasn't sure if it was a bit over kill lol. I'm pretty sure I've got a load round my mums house from years back.
Funnily enough, I was thinking about using weights but wasn't sure if it was a bit over kill lol. I'm pretty sure I've got a load round my mums house from years back.

MK11
I have just got a few more parts to try out and to try and improve the marker poles so again I'll try to explain how they are made.
Firstly as in the MK1 end tapered end where the weight is to be attached hasn't changed at all so the process is the same,the difference is the ends of the poles where they are joined together.
Instead of using a end cap I have now used a tapered bung, they are slightly bigger than the inside of the conduit but when pushed down it's a very tight fit you want it inside the tube at about 40mm depth.
I filled the conduit with water from the other end and it's 100% sealed so will not let any water in.

For the connectors for joining the poles together I have now used M6 x 20mm (Round straight connectors) I have found that they are slightly too big for the conduit so I used a hot air gun I guess a hair dryer would do so soften the ends,but once again do not heat up for too long.
I found the conduit softened up brilliantly and I was able to insert the connectors with ease and once the conduit cooled it's a very tight fit.
I still secured it with 2 x rivets and I've decided not to glue these in incase the poles break so you can easily drill the rivets out and pull the connectors and push the plugs out ,the nuts and bolts are not stainless steel so I have asked if they can make them with these in mind and I'm awaiting a answer from them.

As you can see below this leaves a very neat finish and there is no need for any shrink tube, I did test this with water after I removed the bung and did notice that it wasn't totally waterproof but when the bung is inserted the amount of water ingress is very minimal at either end and personally I could live with that having created a neater finish.

The code for the Tapered plug is - ETP044
Round straight connectors - TC115
Again these are sourced from Vital-Parts
If you do use this company ask for a product catalogue as there are some interesting things in there that is carpers can use Ie feet for your bedchair, barrow etc etc.
I have just got a few more parts to try out and to try and improve the marker poles so again I'll try to explain how they are made.
Firstly as in the MK1 end tapered end where the weight is to be attached hasn't changed at all so the process is the same,the difference is the ends of the poles where they are joined together.
Instead of using a end cap I have now used a tapered bung, they are slightly bigger than the inside of the conduit but when pushed down it's a very tight fit you want it inside the tube at about 40mm depth.
I filled the conduit with water from the other end and it's 100% sealed so will not let any water in.
For the connectors for joining the poles together I have now used M6 x 20mm (Round straight connectors) I have found that they are slightly too big for the conduit so I used a hot air gun I guess a hair dryer would do so soften the ends,but once again do not heat up for too long.
I found the conduit softened up brilliantly and I was able to insert the connectors with ease and once the conduit cooled it's a very tight fit.
I still secured it with 2 x rivets and I've decided not to glue these in incase the poles break so you can easily drill the rivets out and pull the connectors and push the plugs out ,the nuts and bolts are not stainless steel so I have asked if they can make them with these in mind and I'm awaiting a answer from them.
As you can see below this leaves a very neat finish and there is no need for any shrink tube, I did test this with water after I removed the bung and did notice that it wasn't totally waterproof but when the bung is inserted the amount of water ingress is very minimal at either end and personally I could live with that having created a neater finish.
The code for the Tapered plug is - ETP044
Round straight connectors - TC115
Again these are sourced from Vital-Parts
If you do use this company ask for a product catalogue as there are some interesting things in there that is carpers can use Ie feet for your bedchair, barrow etc etc.
In reply to Post #27
As for the weight I made my own as I have some lead myself,I used a qui ck link with a size 8 swivel and put two bits of wire through the swivel then doubled the wire over to make 4 strands.
The 4 loose ends of the wire was clamped into a cordless drill the swivel end was gripped with pliers and I then started the drill to twist all the cables together.
I then just simply cut it down and bent the bottom end so it could stand up,I then simply put this into a empty tin from Sainsbury's that had some kids food in.
I filled it with molten lead and when cooled used a piece of heat shrink so it covers the quick link tail so no line could snag on it, ONLY shrink down the very bottom of the heat shrink over the swivel as this will let you fit your marker poles to the quick link as seen below.

These weights are just over a kilo 👍
All in with the bits needed and dependant on how long you make your poles i believe a whole 16ft set can be made for around £20 👍
As for the weight I made my own as I have some lead myself,I used a qui ck link with a size 8 swivel and put two bits of wire through the swivel then doubled the wire over to make 4 strands.
The 4 loose ends of the wire was clamped into a cordless drill the swivel end was gripped with pliers and I then started the drill to twist all the cables together.
I then just simply cut it down and bent the bottom end so it could stand up,I then simply put this into a empty tin from Sainsbury's that had some kids food in.
I filled it with molten lead and when cooled used a piece of heat shrink so it covers the quick link tail so no line could snag on it, ONLY shrink down the very bottom of the heat shrink over the swivel as this will let you fit your marker poles to the quick link as seen below.
These weights are just over a kilo 👍
All in with the bits needed and dependant on how long you make your poles i believe a whole 16ft set can be made for around £20 👍
The looks really neat mate good job, wher did you get the parts from?
https://www.vital-parts.co.uk/
In reply to Post #30
👍🏻 Cool, I'll take a look
👍🏻 Cool, I'll take a look
In reply to Post #30
Hi hitman, had a look and see they do them in 18mm do you think they'd be too loose or OK with a bit of glue?
Hi hitman, had a look and see they do them in 18mm do you think they'd be too loose or OK with a bit of glue?
They will be too small as the internal diameter of the conduit is 19.7mm that's why I went with the 20mm 👍
In reply to Post #33
OK, cheers mate.
OK, cheers mate.
In reply to Post #33
Thanks for sharing this little gem.
Thanks for sharing this little gem.
In reply to Post #35
My pleasure 👍
My pleasure 👍
In reply to Post #36
👍
👍
Hi,
How do you join the poles so they don't snag line on the join?
How do you join the poles so they don't snag line on the join?
In reply to Post #27
hi great diiy job on he marker [pole,just to confirm the bung used is code is etp044 as i see a 19mm bung is etp 045.can anyone confirm this is correct before i purchase,
just realised there maybe different conduit internal diameters.yoiurs you say is 19.7mm id and screwfix conduit is 17mm id,
will order accordingly
thanks in advance
hi great diiy job on he marker [pole,just to confirm the bung used is code is etp044 as i see a 19mm bung is etp 045.can anyone confirm this is correct before i purchase,
just realised there maybe different conduit internal diameters.yoiurs you say is 19.7mm id and screwfix conduit is 17mm id,
will order accordingly
thanks in advance